Cove Outdoor Camera Motion Detection Best Practices
The Outdoor Camera is designed to capture video of motion-triggered events. It does not record everything 24/7, since this would require more storage than a cloud-based camera can handle. Instead, the camera begins recording once it registers motion, and records for a set period of time (typically 6-60 seconds) after the motion event occurs.
Additional storage option: The camera has a port to insert a MicroSD card and also includes 7 days of free cloud storage, which you can download to your device.
What is the automatic recording duration?
The default recording duration is set to 6 seconds, but it can be adjusted to up to 60 seconds. You can adjust this via your camera’s settings in the Cove app. Just pull up the live feed, click on the gear icon, click on “Recording Duration” and toggle the slider to the desired length.
Please note: the longer the duration setting is, the longer the camera takes to render and notify you when it’s triggered.
How to receive notifications on your phone/device?
In order for you to receive notifications when your camera completes a recording, you will need to have the following notifications enabled:
Videos and Photos—In order for your device to receive a notification through the Cove app, you’ll need to enable video and photo notifications for that camera.If you are currently viewing a live feed, you will not receive notifications.
User Notifications—Please make sure to have push notifications enabled within the Cove App. Please see this article to set that up.
Smart Detection Settings
These are the settings that allow the camera to notify you when it detects motion. The parameters can be adjusted based on your preference and the environment.

How does it work?
The camera uses an infrared sensor (PIR), which is triggered by heat signatures rather than simple motion.
Filters and Detection
We recommend setting your camera filters based on your individual goals. If you want your camera to capture or avoid specific events, please use the following filters.
The camera has AI filters that you can enable:
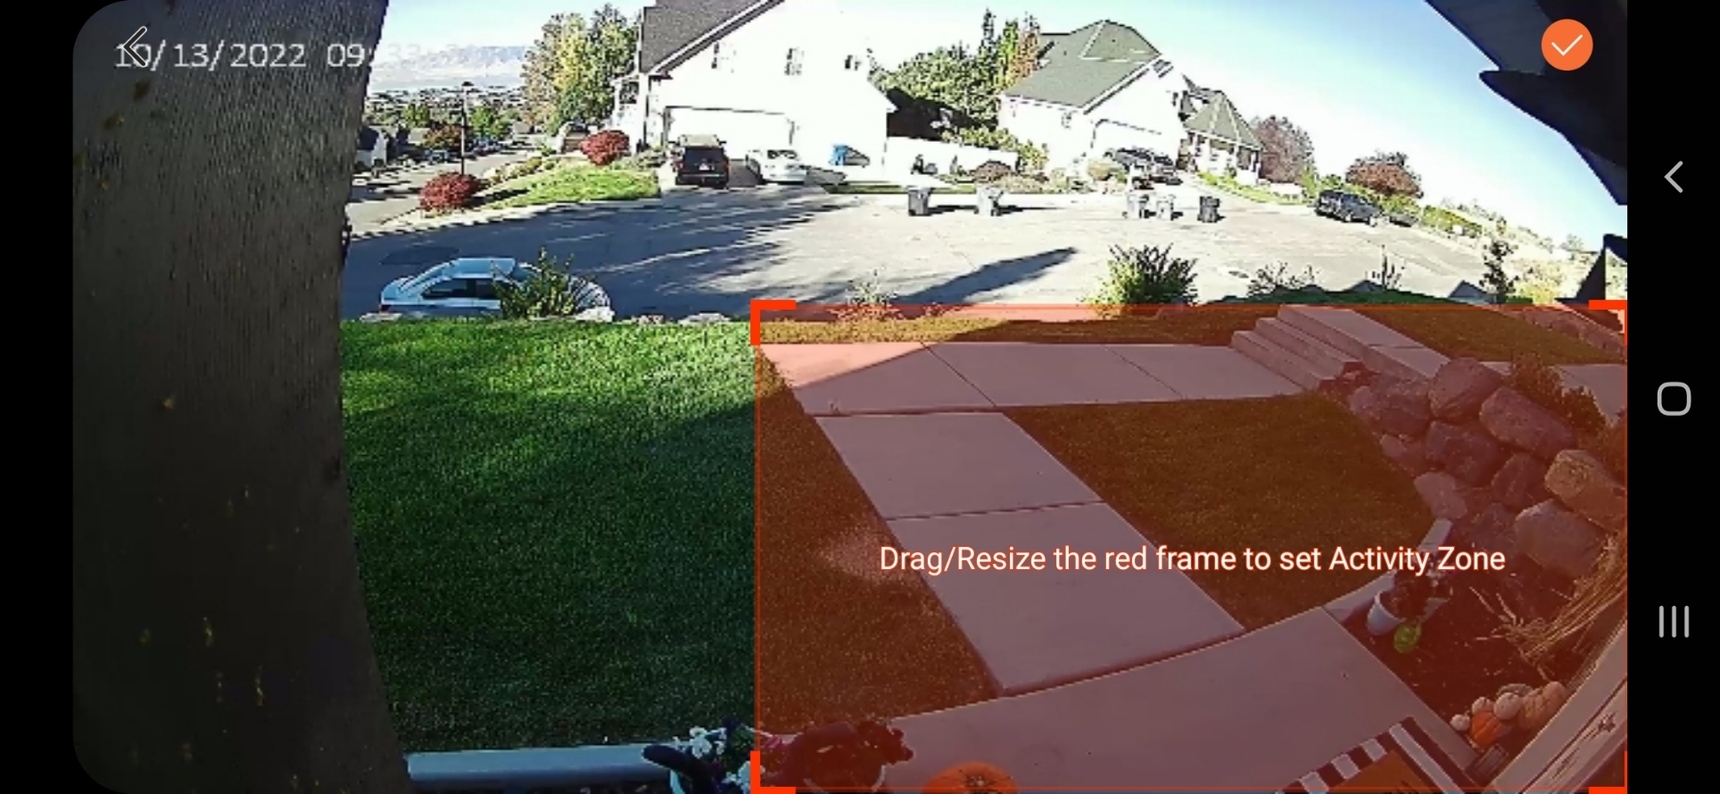
Activity Zone— You can designate areas where the camera can pick up motion. The size of the box can be adjusted to cover anywhere on the live feed. This helps reduce unwanted or unnecessary motion-triggered events (like busy streets).
Human Detection—Uses AI to distinguish between human shapes and non-human objects. When enabled, the camera will only be triggered by objects of human size and shape.
Please note: Having multiple filters can slow down the camera and cause it to miss recordings. For this reason we suggest only having one filter enabled at a time (Activity Zone OR Human Detection.)
Camera Placement Tips
Environment—Try to set up your camera in a place where the field of vision doesn’t include reflective surfaces, common play areas for pets, or busy streets. If you are not able to avoid these areas, you can adjust your settings to try and minimize the number of unnecessary recordings.
Range—The optimal range for the Outdoor Camera is 0-30 feet.
Recommended installation height—at least 4 feet above ground
Viewing Angle—140° Wide Angle
Please note: Having multiple filters can slow down the camera and cause it to miss recordings. For this reason, we suggest only having one filter enabled at a time (Activity Zone OR Human Detection.)
Alert Frequency—After an alert is triggered, it takes a few moments for the camera to recalibrate before it will automatically record again. You can change this setting from “Low” (Longest amount of cooldown time) to “High” (Least amount of cooldown time).
To adjust this setting:
Pull up live feed of the camera
Click on the Gear Icon
Click on “Smart Detection”
Click on “Alert Frequency”
Use the slider to select the alert frequency you desire
Please note: The Higher the frequency of recordings, the more battery consumption it takes to record meaning shorter battery life.
Alert Schedule—You can set alert schedules for your cameras to avoid notifications during certain times of the day.
To adjust this setting, follow these steps:
Pull up live feed of the camera
Click on the Gear Icon
Click on “Smart Detection”
Click on “Alert Schedule”
Either set the default 24/7 or click “Customized Alerts” and adjust the days of the week and time frame during which you’d like to be notified. You can set up to 3 specific rule alerts.