How to Mount Your Kami Doorbell Camera (Mechanical Doorbell)
Before You Get Started:
Make sure you've completed the pairing process for your doorbell camera and that the camera connects to your Wi-Fi network from the location at which you intend to install your camera.
You'll need to determine if your doorbell is mechanical or digital. To find out, press your current doorbell button. If it makes the classic “ding-dong” bell noise, you probably have a mechanical doorbell. If a melody or chime plays through a speaker, then your doorbell is digital.
Materials
What’s Included?
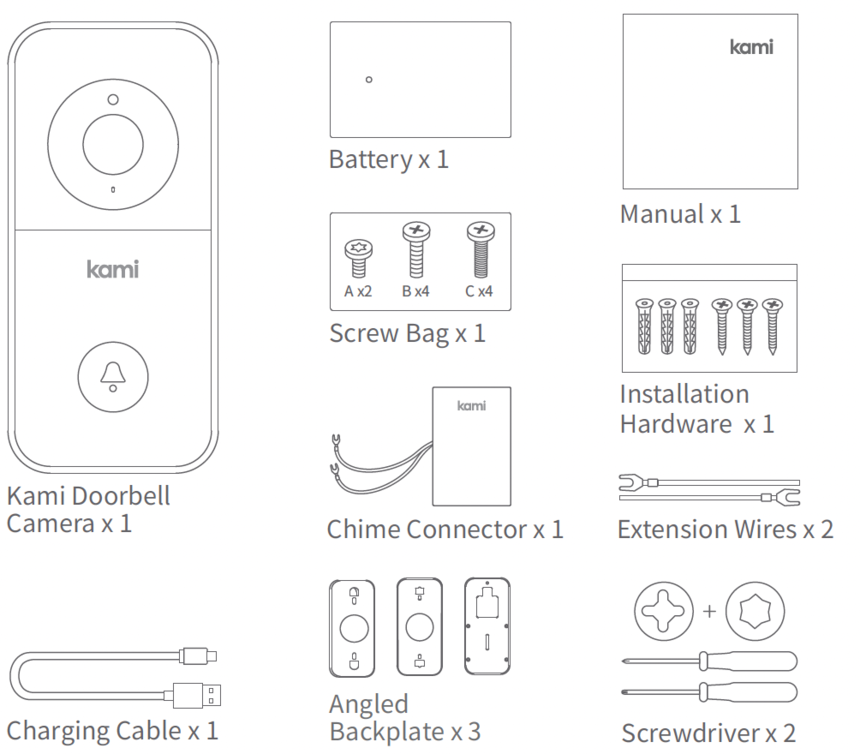
What You’ll Need
1/4 Inch Drill Bit
Drill
Mounting Your Doorbell Camera
Go to your home’s breaker box. Turn off the breaker that powers your doorbell. If you’re not sure which breaker powers your doorbell, you can turn off the master breaker.
Unscrew and remove your existing doorbell. Disconnect the two wires from the doorbell and leave them exposed and separated, as they will connect to your new doorbell camera. To keep the wires from disappearing into your wall, you may consider bending or taping them to hold them in place temporarily.
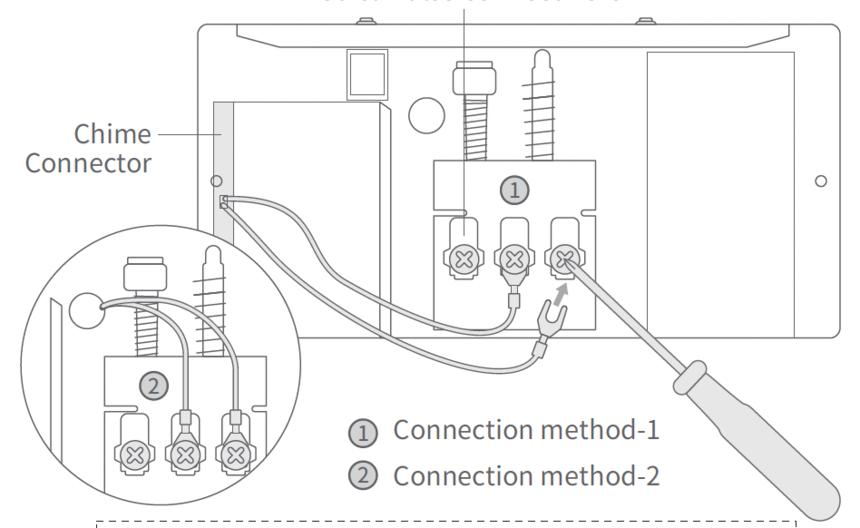
Go to your chime box. Remove the cover. Connect the chime connector’s forked wires to the “trans” and “front” ports. Screw the terminal screws back in place until secure. Set the chime connector inside the chime box and replace the chime box cover.
Select a backplate for your camera based on your desired camera angle.
If you’d like the camera to point straight ahead, use Backplate No. 1.
If you’d like the camera to point in a specific direction, use Backplate No. 2. If you’d like the camera to angle up or down, use Backplate No. 3.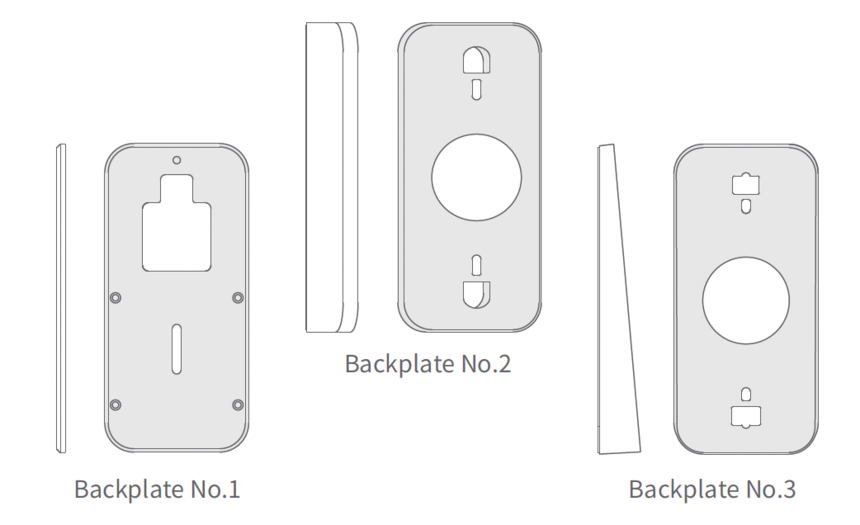
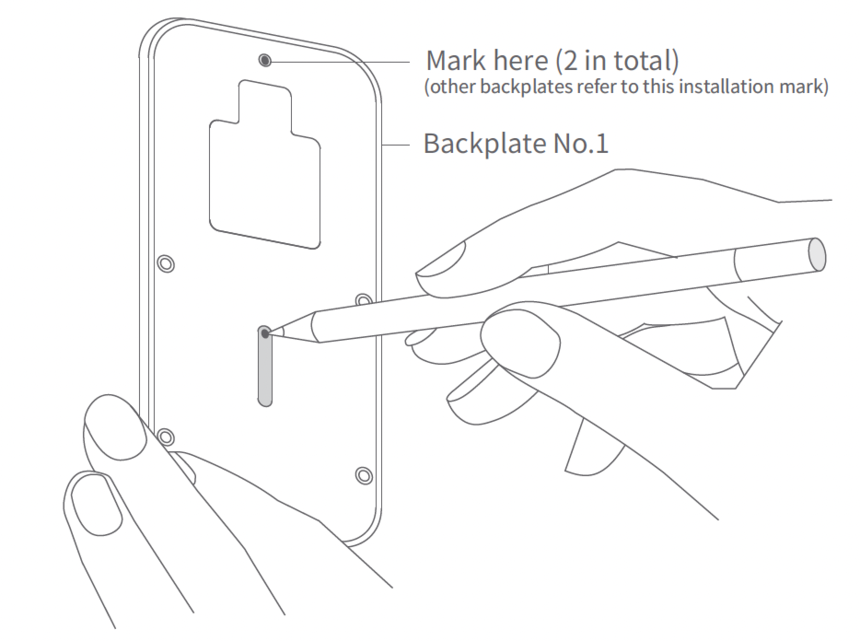
Hold your desired backplate against the wall. With a pencil, mark the desired distance between the two holes in the backplate. Drill holes in the two spots you’ve marked.
Screw your backplate into place using the included long screws and wall anchors (see image). Pull the wires from the doorbell through the backplate.

Remove the cover on your doorbell camera.

Loosen the two small terminal screws on the back of the camera slightly to allow for the ends of the doorbell wires to pass underneath. Insert one doorbell wire under each screw and tighten. Give each wire a slight tug to be sure they are secure. Tuck in any excess wire behind the backplate.

Use 4 of the included screws (Screw C if you are using Backplate No. 1, or Screw B if you are using Backplate No. 2 or 3) to attach the camera to the backplate
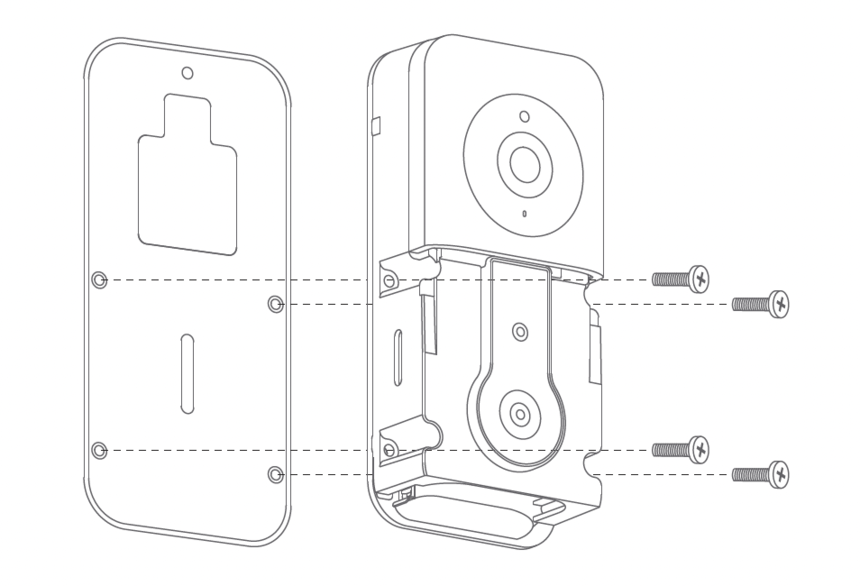
Snap the protective cover onto the doorbell camera, and fix the cover in place using Screw A.
Turn your doorbell breaker back on. If the indicator light on your camera is blue, this means your camera is working correctly.
