How to Charge and Pair Your Kami Doorbell Camera
Instructions on installing and pairing your Kami Doorbell Camera
A Few Things to Know:
This camera runs off of a 2.4GHz Network, so if your router is dual-band, please make sure your phone is connected to the 2.4GHz network before starting. If you are unsure what network your router is broadcasting, we suggest contacting your Internet Service Provider and they can let you know which one it is on and how to switch it to the 2.4 GHz.
This doorbell camera communicates using the Cove Security app, so if you do not see the camera icon at the bottom right of your app's home screen, please call us at 855.268.3669, and we can help you get that added.
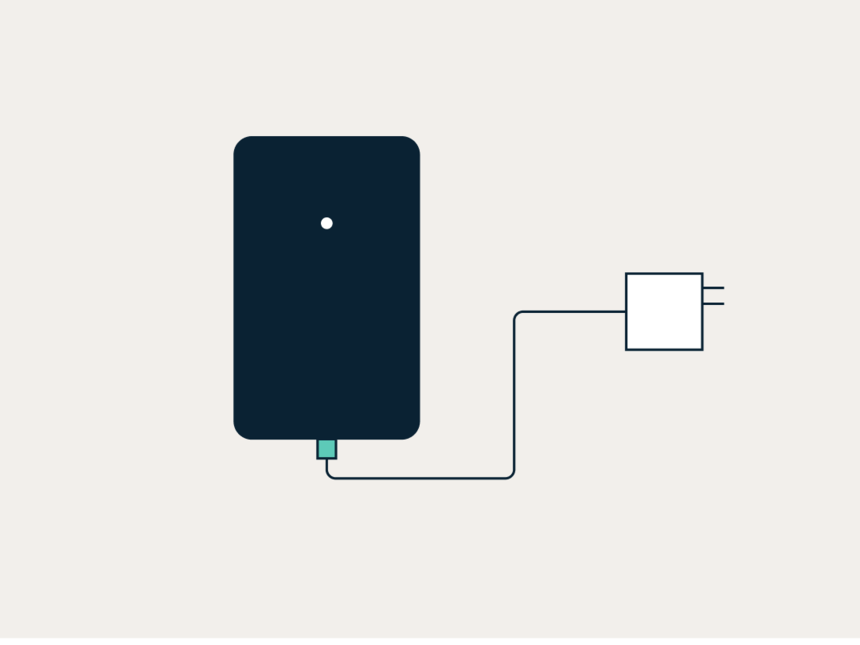
Charging Your Camera
Whether you decide to wire your Kami Doorbell Camera to your home's existing wiring, or you choose to power the camera with battery only, you'll need to make sure your camera is fully charged.
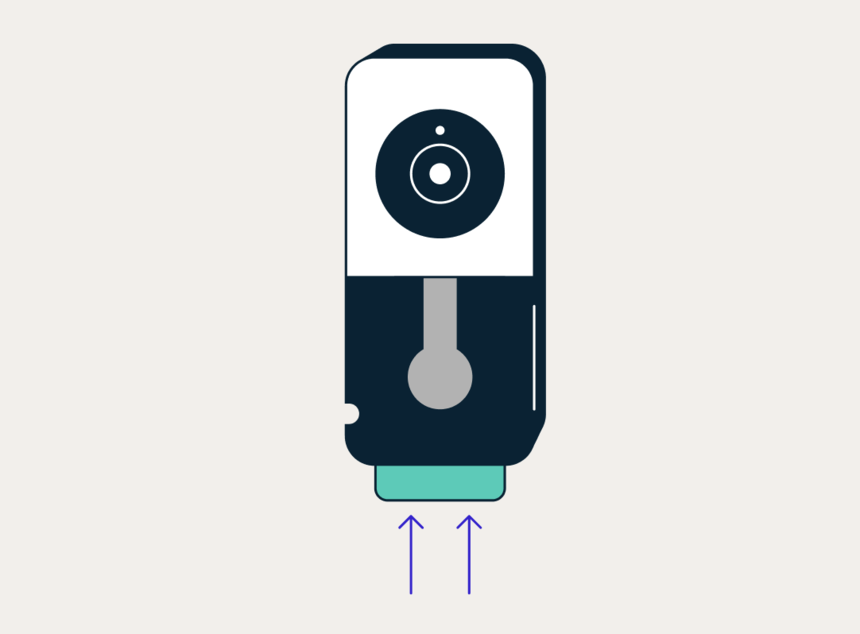
Remove the protective cover from your camera by pressing down on the top portion of the camera and lifting the cover until you hear a snapping sound.

Charge your battery using the included micro USB cable. Once your camera is fully charged, the indicator light will turn from red to green (this can take up to 6 hours).
Push the battery into the battery compartment. Ensure that the battery is inserted in the correct direction. *To remove the battery, push the tab adjacent to the compartment down.
The Pairing Process
Download the Cove Security app from the Google Play Store or App Store. Sign in to the app. Make sure your phone is connected to your home Wi-Fi network.

Once you’re logged into the app, select the camera icon in the bottom right-hand corner of the screen. Then tap the “+” symbol to add a camera. Select “Kami Doorbell Camera.”

If this is your first time pairing a camera, you may be prompted with a request to access your phone’s camera. If so, click "allow."
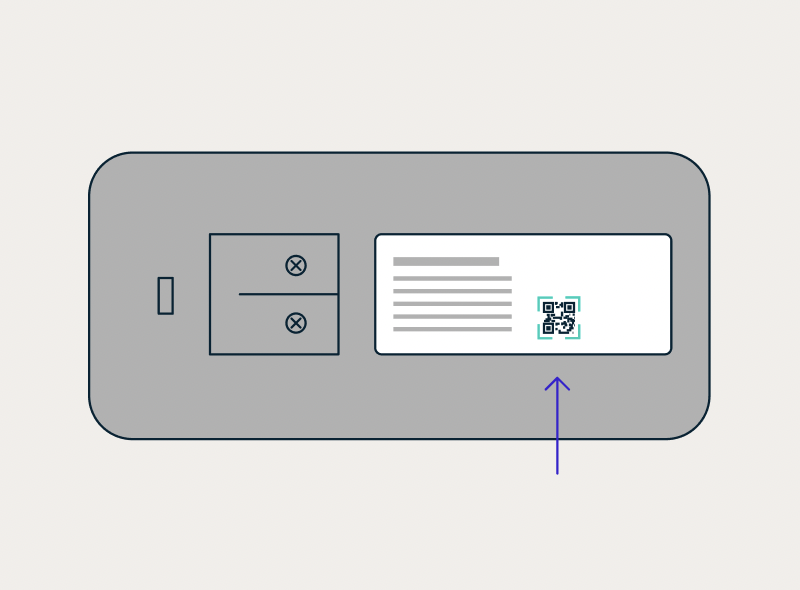
Scan the QR code on the back of the doorbell camera.
Insert the battery into the camera. Once the battery is inserted, the camera should say, “waiting to connect.” Tap “I heard ‘waiting to connect.’”
Next, you'll provide your Wi-Fi information. If your phone is connected to a 2.4GHz network, the Wi-Fi name or SSID will be automatically populated on the top text field. If your phone is not connected, it will prompt you to connect your phone to Wi-Fi. Connect to your Wi-Fi and then go back to this page. The next text field is for you to enter your password for your Wi-Fi. This section is case-sensitive, so if you have any special characters or capital letters, ensure those are entered correctly. Once you’ve entered your Wi-Fi information, tap "Connect to Wi-Fi."
Your phone should then generate another QR code. Point the doorbell camera at the QR code from a distance of 3-8 inches away. If you are having trouble, tilt the phone at a 45° angle. Once the code is scanned, the camera should say, “QR code scan is successful.” Now, you can tap “Next” on your screen.
Your phone should then show a screen that says, “Retrieving pairing status.” It can take up to two minutes for your camera to pair. Once the camera has successfully paired, your phone and camera will both say, “Pairing is successful.”
Next, you’ll select a name for your doorbell camera. Once you’ve named your camera, click “Save” and the camera will save.